When I designed my kitchen, even from the very first sketches, I wanted two narrow windows on either side of the stove with a rustic wooden vent hood between them over the stove. It was a wonderful idea, but when you’re trying to complete the house and pass all of the inspections and meet standards for occupancy and gather all of the documents for rolling your construction loan into a final mortgage…. it gets exhausting. And things like making a beautiful vent hood drop pretty low on the list of things that need to get done RIGHT. THIS. MINUTE.
So for months after we moved in, my vent hood was constructed in the back of my mind and I was forced to just imagine it was there.
I mean, it’s not horrible. But it was definitely saying, “Hey, something should probably go here.”
So after we had settled into our new house and rested for a while (because building your own home is quite a mountain to climb), I started to get the itch to make it happen. So, first I measured (like, probably 100 times) and decided where I actually wanted this big baby to go. I did some research and decided to use the Broan PM250 Range Hood with the LB30 Range Hood Liner. It fit nicely in the space I had to work with and was going to do just what I needed it to.
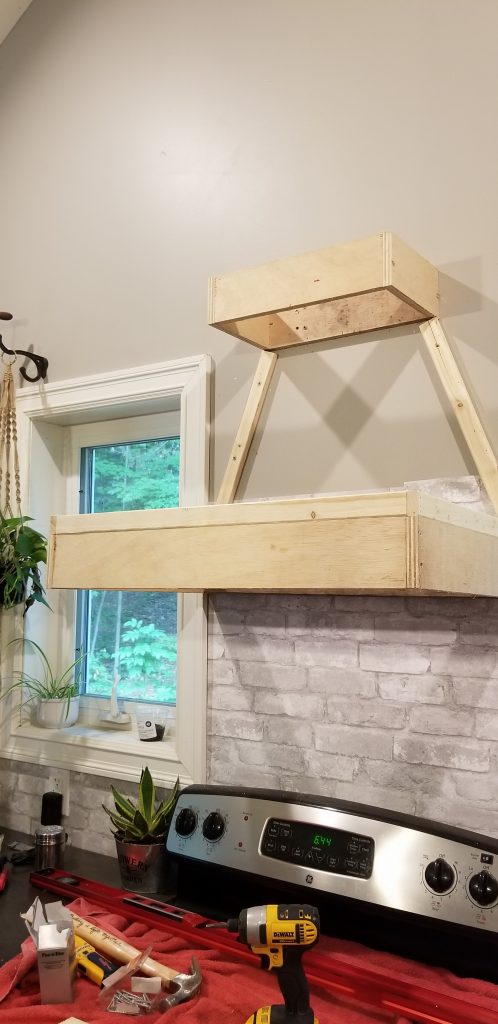
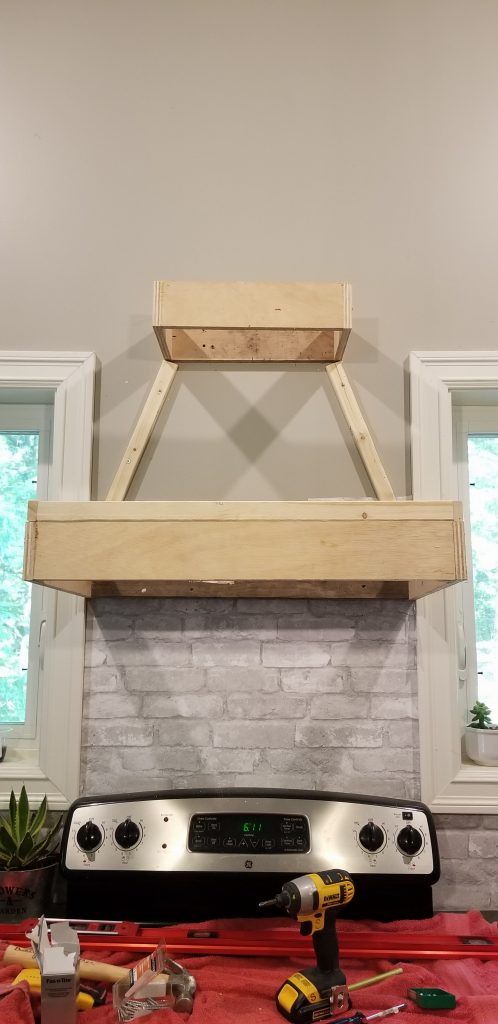
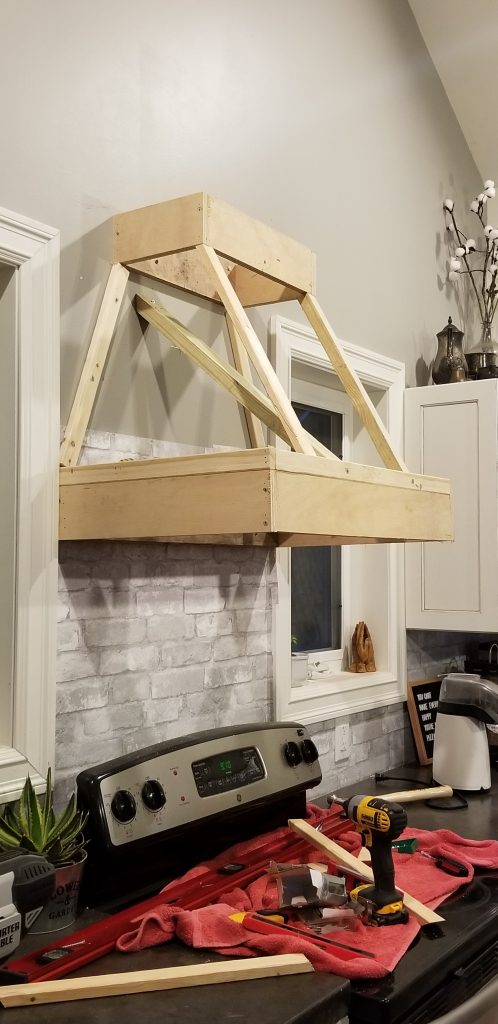
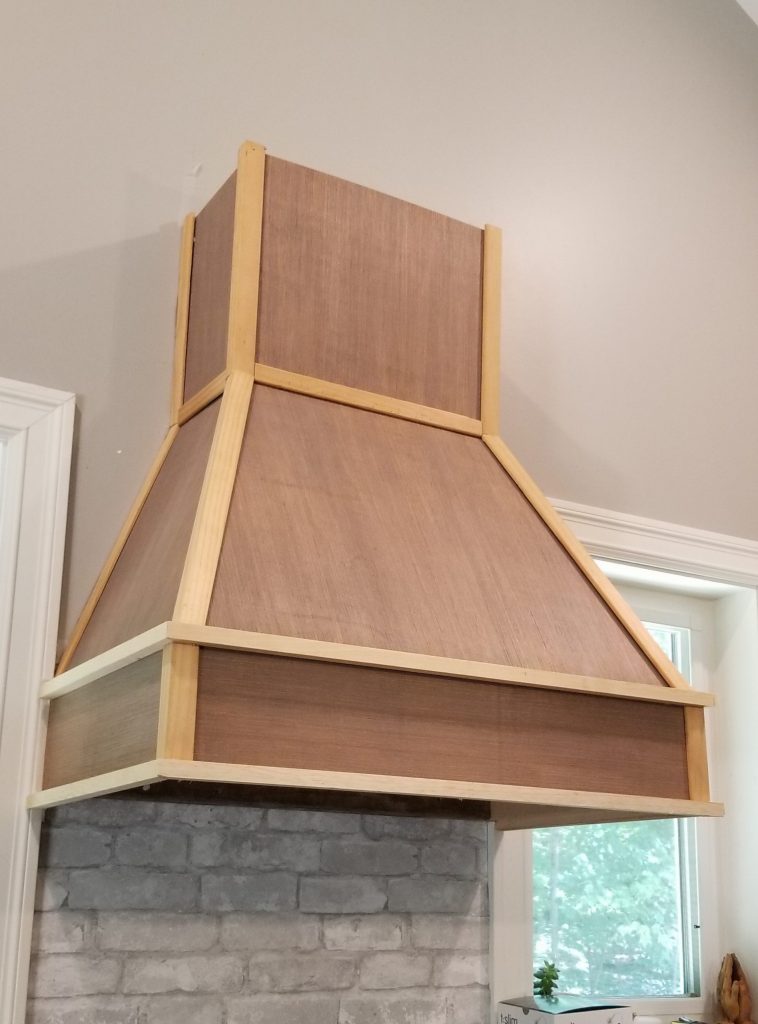
I used 3/4″ plywood to make the box that would hold the actual vent on the wall. After changing my mind a few more times, I decided that instead of a 4 inch face, I wanted it to be 6 inches. So I added another 2 inch furring strip on top of that to give it the height I wanted. I then measured the angles and height of the entire hood, and constructed another box for the top and used 2×2’s and 2×4’s to construct the skeleton and ensure it wasn’t going anywhere.
I’m a visual person, so I couldn’t move forward until I cut the sides and basically built the final product out of cardboard. This also really helped me decide which types of materials I needed to get the job done with real wood.
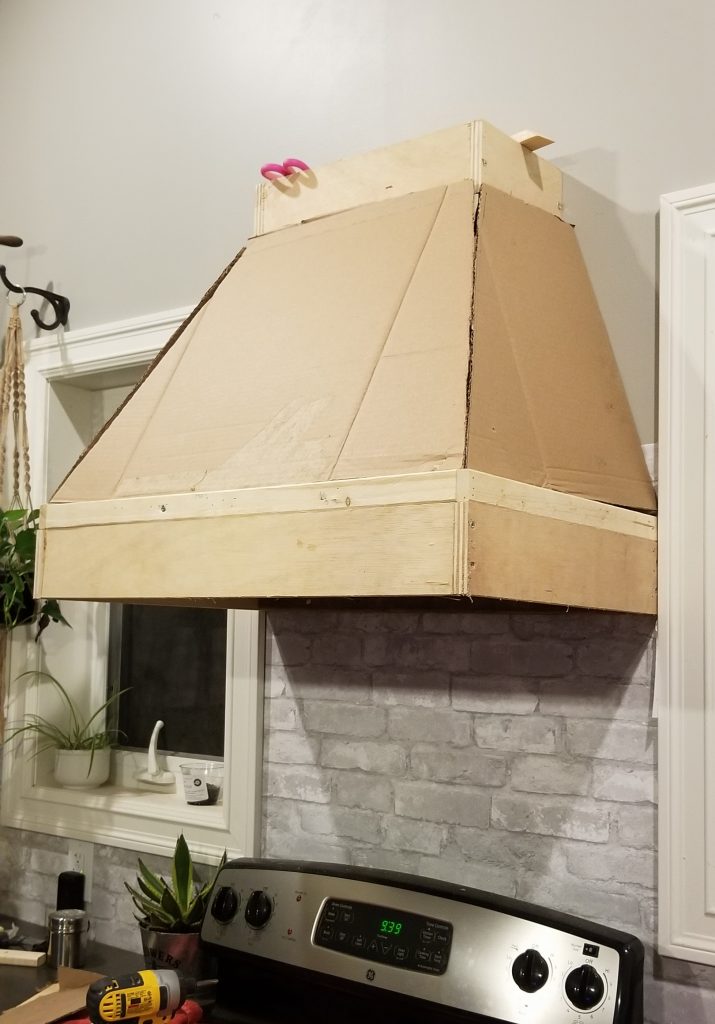
After I was satisfied with that, I ran down to home depot and bought a 4×8 sheet of 1/4″ plywood. I had them cut the pieces I needed (minus the angles) and went back home. After I carefully measured the angles, I used a jig-saw to cut each piece exactly to the size I needed. I got these cuts close but I knew I didn’t have to be super precise with them because I had planned on covering each joint with trim when it was finished. It didn’t take long, and the whole thing was covered.

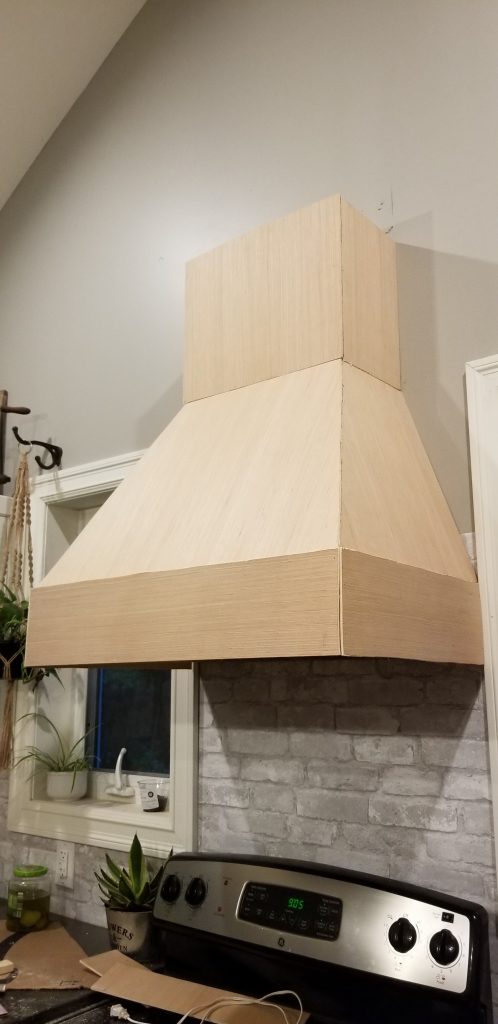
The next thing I did was buy the trim pieces I needed and installed them. I found most of the trim I needed at Habitat for Humanity. I used 90 degree corner trim anywhere it would fit and then pieced everything else together with plain wood trim over every seam.
If anything left too much of a gap, I just stuffed with wood filler and sanded. Next was the sanding, staining and finishing. It took me a couple of tries to get the tones to mesh with the black walnut that my island is made of. I think I finally got it right!
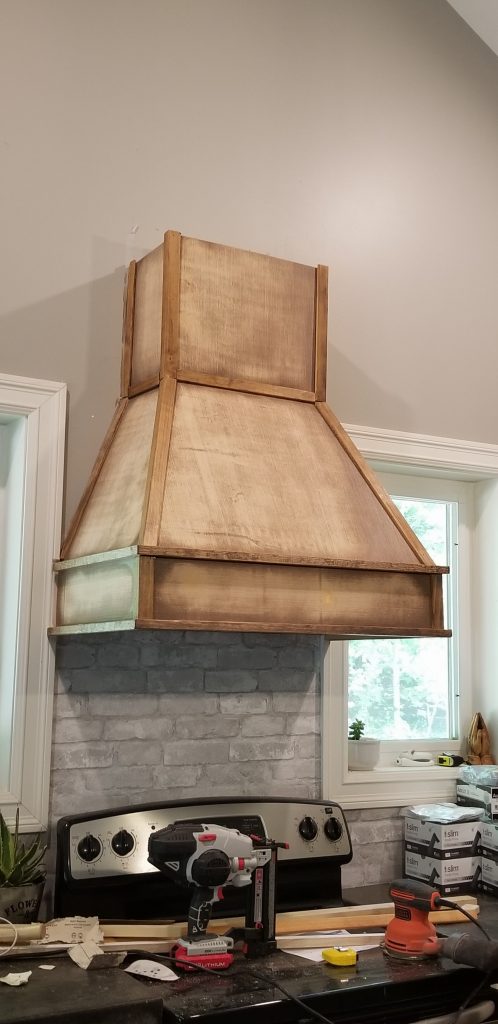
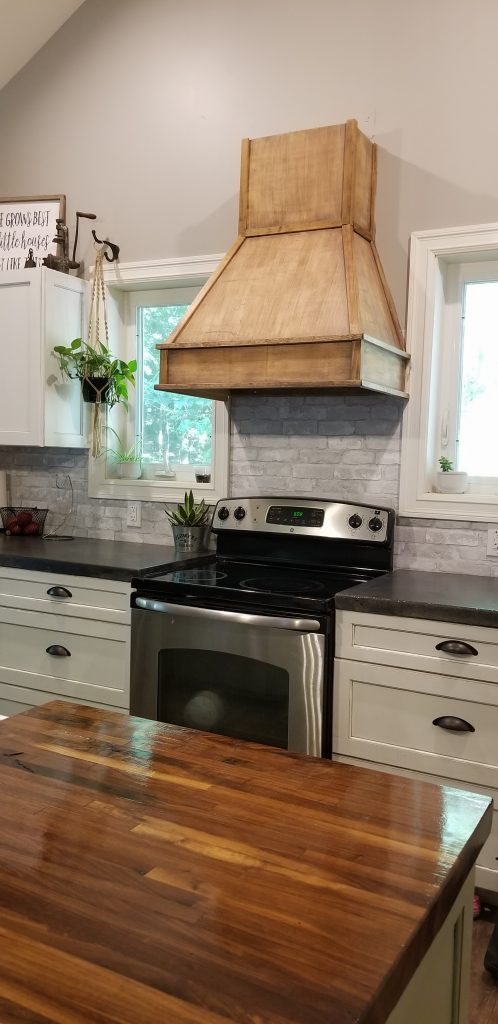
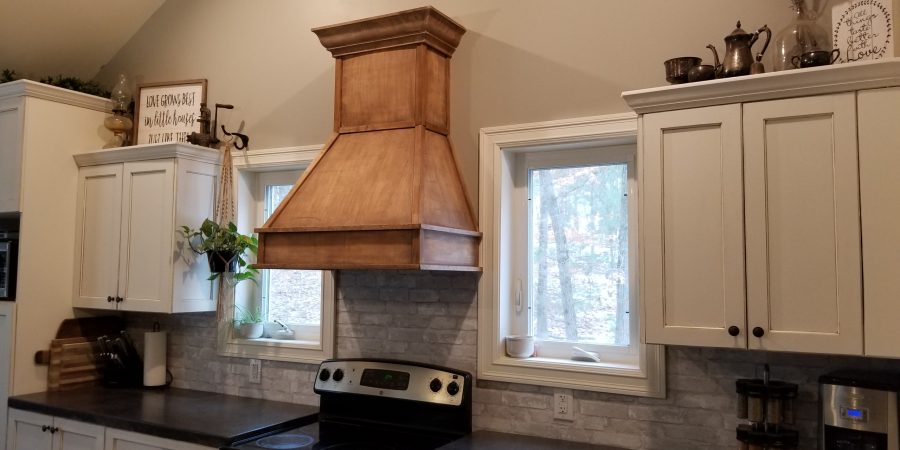
Now, here’s my secret: I really didn’t know what I wanted to do about the top. The center peak of my vaulted ceiling is directly above the stove, so I would have about 10 feet of empty, fake stove pipe cover pointed straight up to Heaven in the middle of the kitchen. So, once again, my range hood sat unfinished for another couple of weeks while I contemplated what I really wanted to do. Then one day while browsing through Habitat for Humanity (I know, the amount of time I spend there is kind of a problem) I found some really chunky oak crown moulding that really wanted to come home with me. So I cut it, installed it, and stained it to match. And this is how it ends:
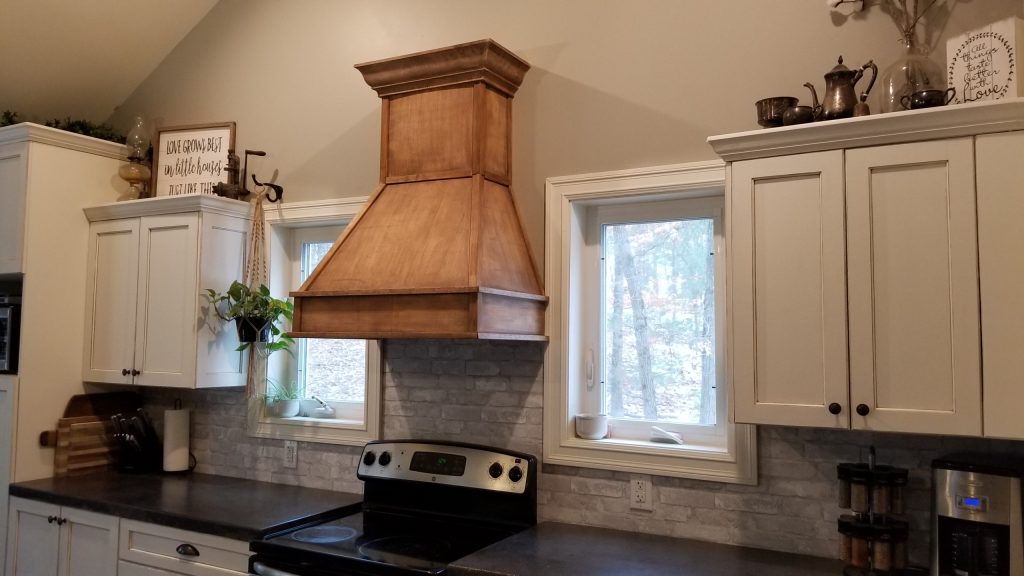
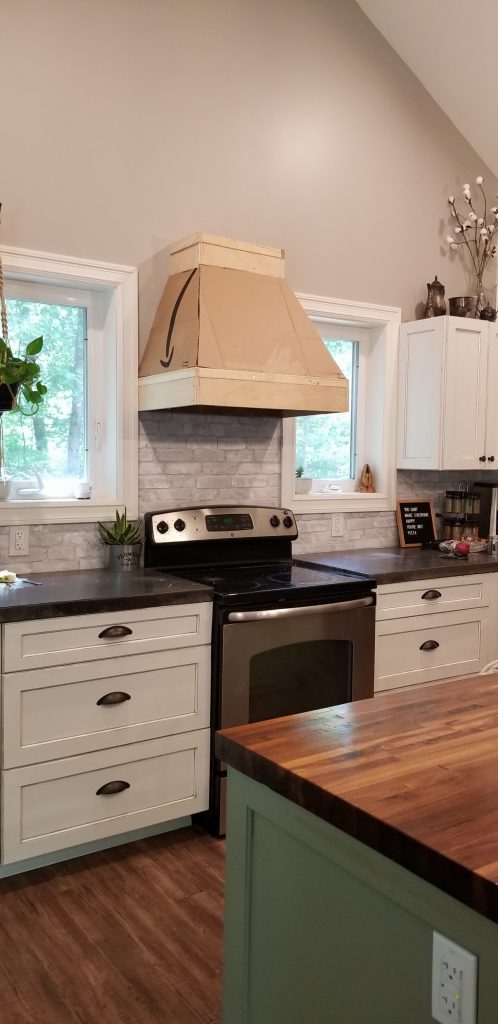
This project has had a significant impact on the way my home feels. I can’t believe I went so long with it being so bare in the middle! It cost me less than $40 to finish, too! I’d say it’s worth it!