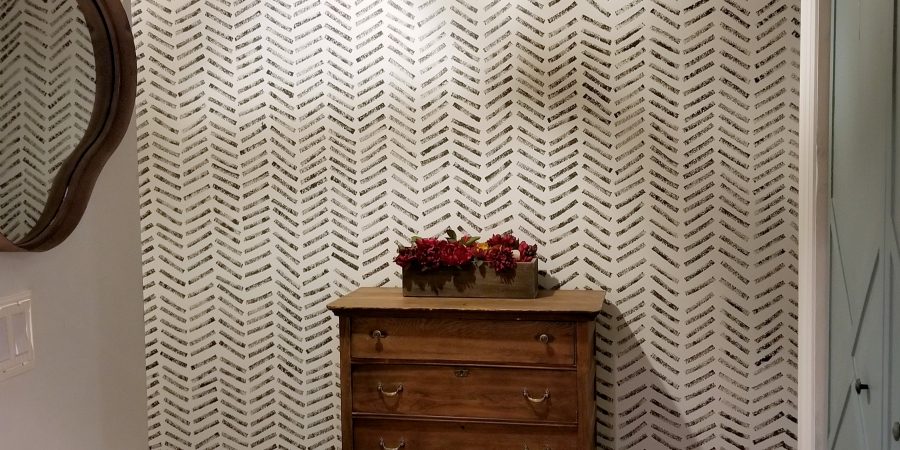
At the bottom of my basement stairs was a plain white room that separates the guest room from the media and play room. There is no natural light right there, so I originally painted it white to make it as bright as possible. I recently got the itch to add some interest and wanted to paint a high contrast feature wall.
I’ve used stencils before with good results, but I wanted something that felt a little more organic. I was inspired to use a sponge this time and make my own pattern.
A few weeks ago I painted a wall in my bedroom black. The journey to find the perfect black was frustrating, to say the least. Long story short, I had a can of BM Iron Mountain that didn’t work in my bedroom, but would be perfect for this!
This is how I started:
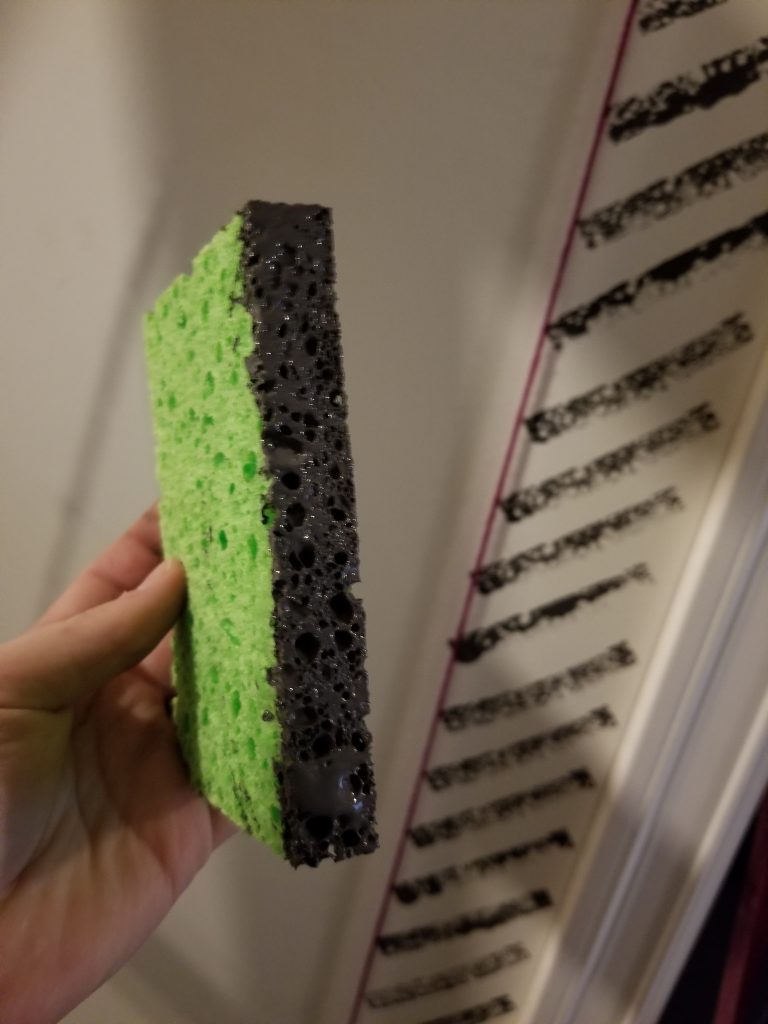
Armed with my sponge and can of paint, I started making a chevron pattern.
It seemed easy enough at first, but it didn’t take long to figure out that going up 9 feet from floor to ceiling, holding a sponge at an angle was not going to give me straight lines. Even though I was intentionally painting this wall imperfectly, I really wasn’t going for imperfect and wonky.
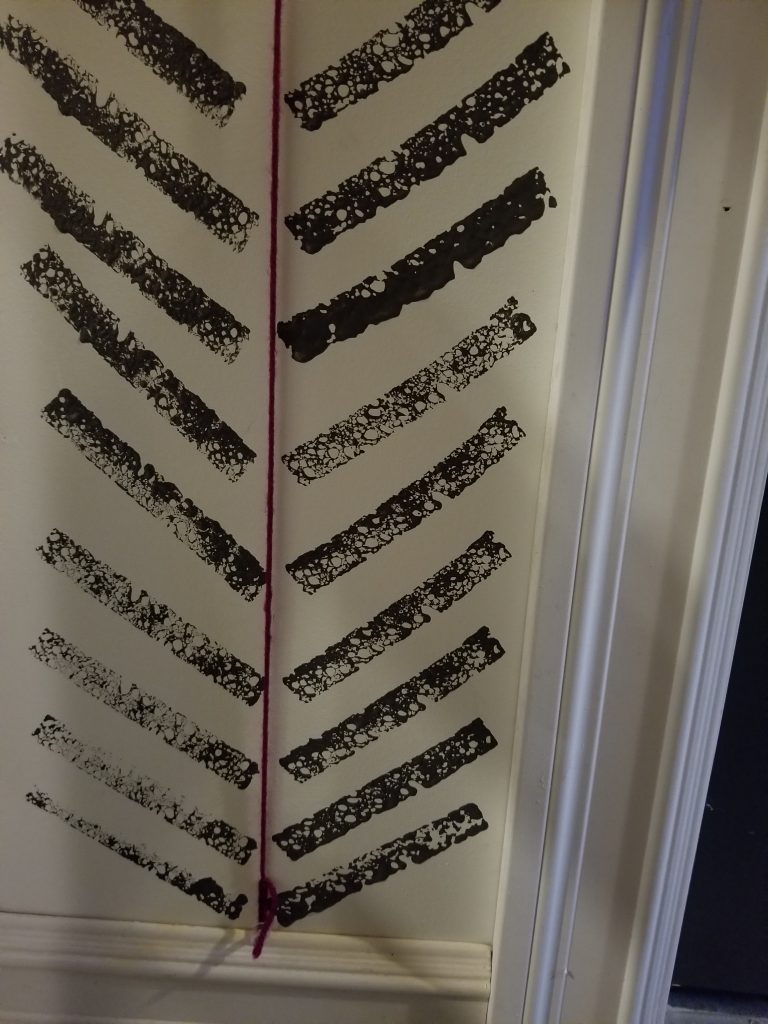
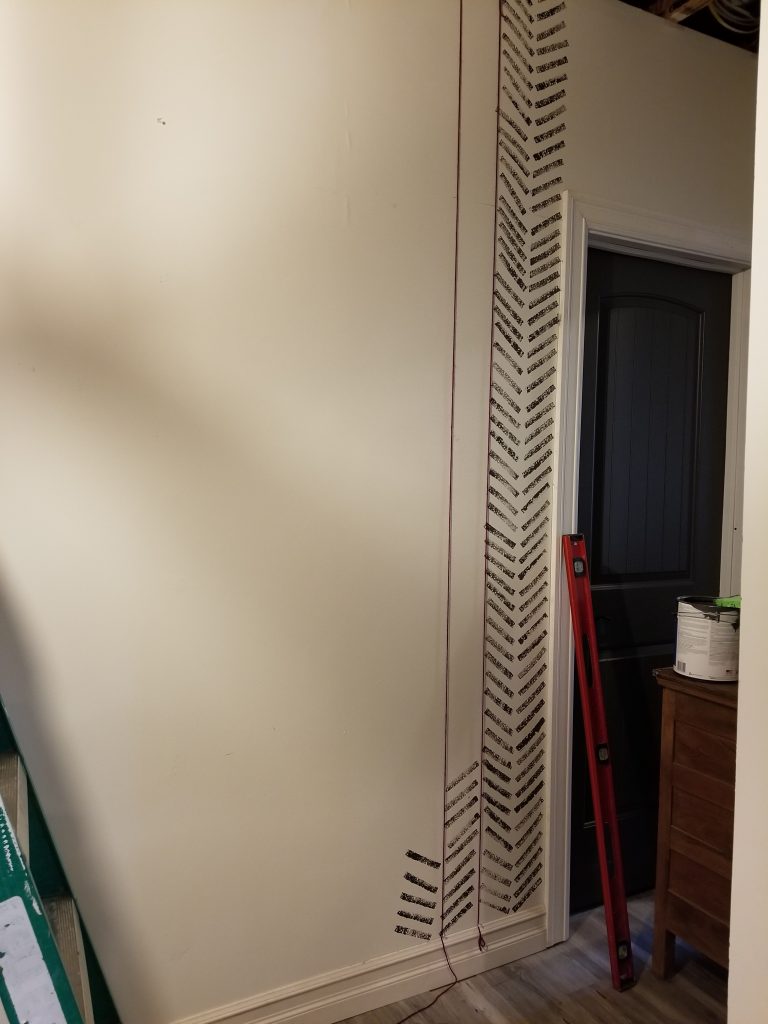
To prevent the despair of painters’ remorse I used a length of yarn and some thumb tacks to mark the edges of each row of sponge marks. I have a strong aversion to painters’ tape. Especially in this situation, it was really not necessary.
From the edge of a door, I painted my first line of marks and went up high enough to get an idea of how much space each row would need. I placed one end of the yarn on top of the baseboard and then used a level to ensure that my line was going to be straight. Then I went to the ceiling and tacked the top.
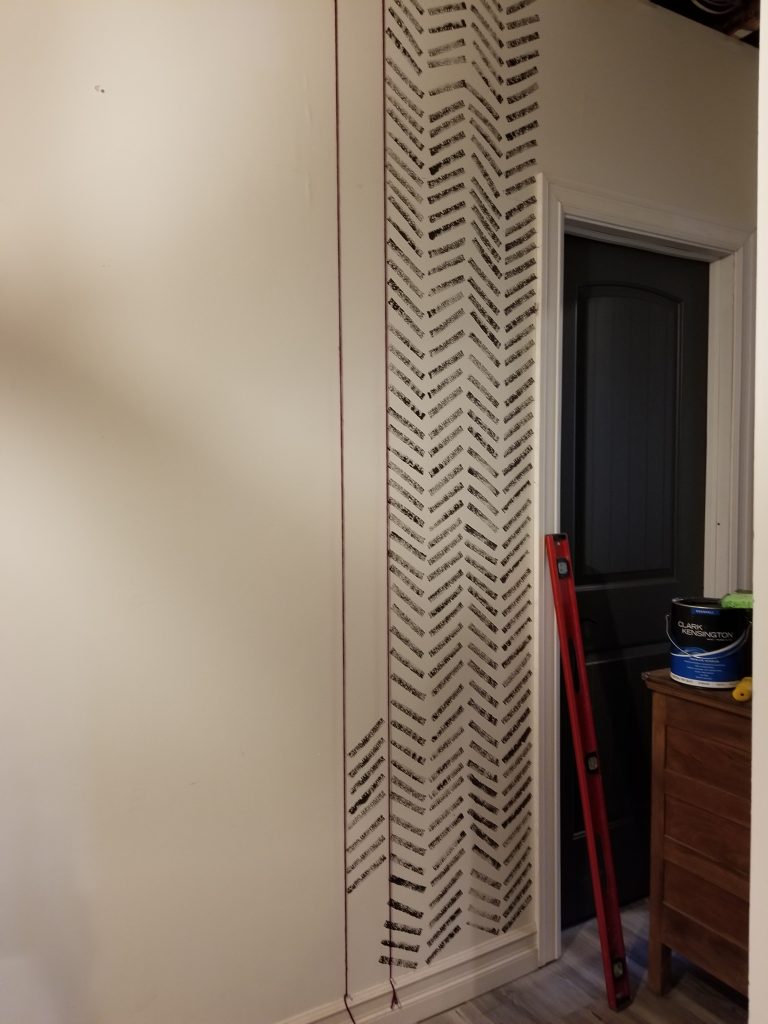
Each time I dipped the sponge, I wiped a little bit off on the edge of the can so I wouldn’t get any drips. I blotted it on the wall 5-10 times before needing to reapply more paint. In the first couple of rows I began to notice that I could tell where I had stopped to reapply paint. This had less to do with the amount of paint on each mark, and more to do with how I was applying it. Instead of holding the sponge in the same direction, I started flipping it with each mark. It added more variation and I couldn’t tell in the later rows where I had stopped to add more paint.
You know, when you start doing the same repetitive motion it gets to be just muscle memory? Doing that simple flip changed each mark just a little. It eliminated the noticeable batches of marks, where 6 or 7 of them all looked grouped.
Every time I finished a row, I moved my string over to make a new “lane” for the next row. Each lane was 4-3/4 inches wide. I just measured from the previous line over and tacked the yarn back down. It sounds like a lot of work, I know. In reality, it didn’t take very long at all!
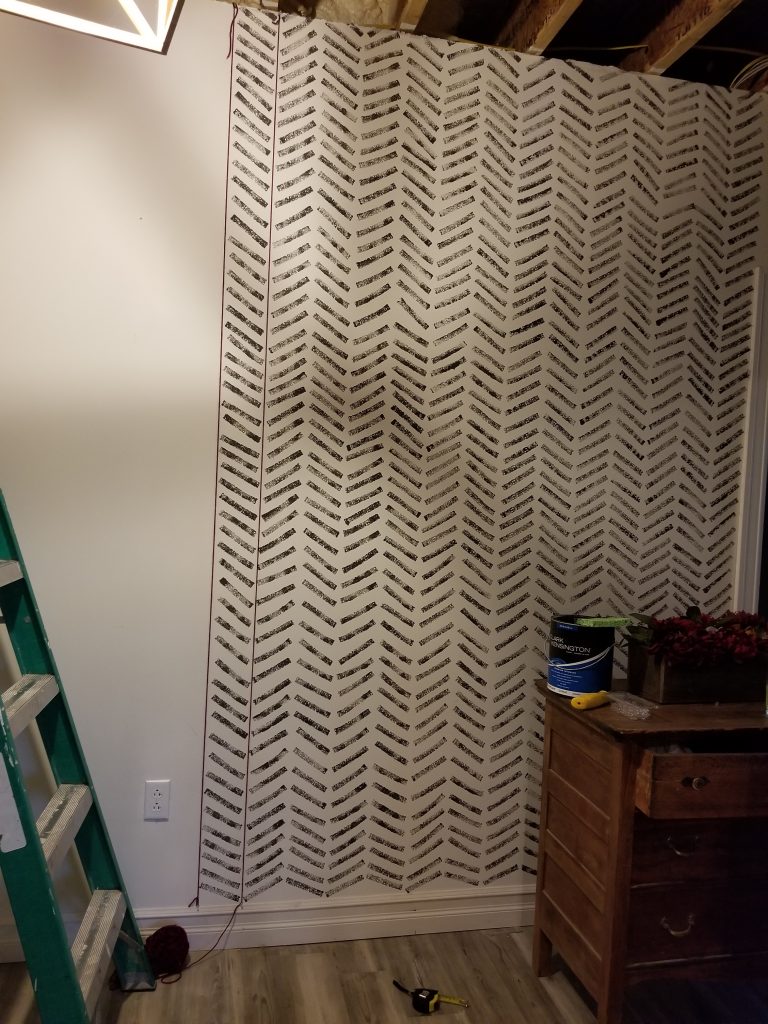
This is about where my husband walked in and said “uh, I don’t know if I like it.” I told him just think of it as a representation of the year 2020. Organized, but chaotic. Maybe if you step back it doesn’t look too bad. Don’t stare too long because you’ll just get caught up in the mess. I’m just hoping that at the end, the bigger picture will make sense. At this point though, it just looks tragic.
I have this really big problem with hating things that I’m doing until I’m finished and then I do a complete turn-around and decide it’s the best thing ever. That feeling started to take hold when I had most of the wall covered. Do I hate it? Nah, I think I like it. Okay, maybe I’ll just paint the whole thing black. Meh, I’ll keep going I guess.
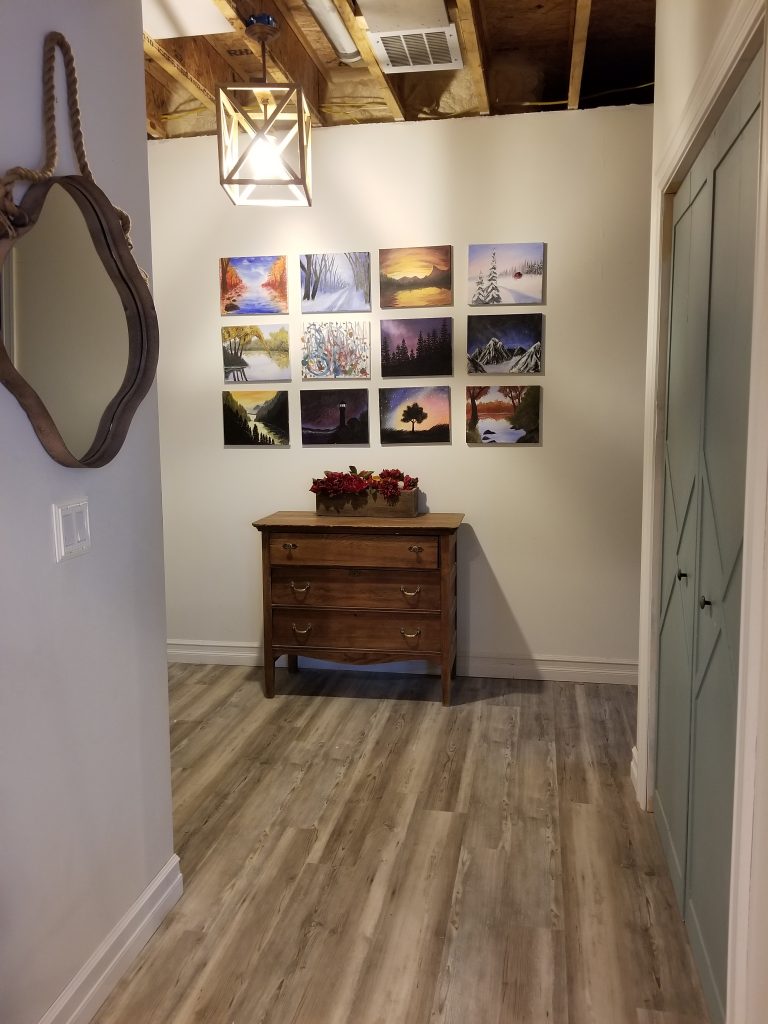
When I was finished I called my seven year old daughter downstairs to check it out. She’s usually a reliable judge, haha. She shrieked and called my husband down, too. He took back his comment and likes it as much as I decided to 🙂
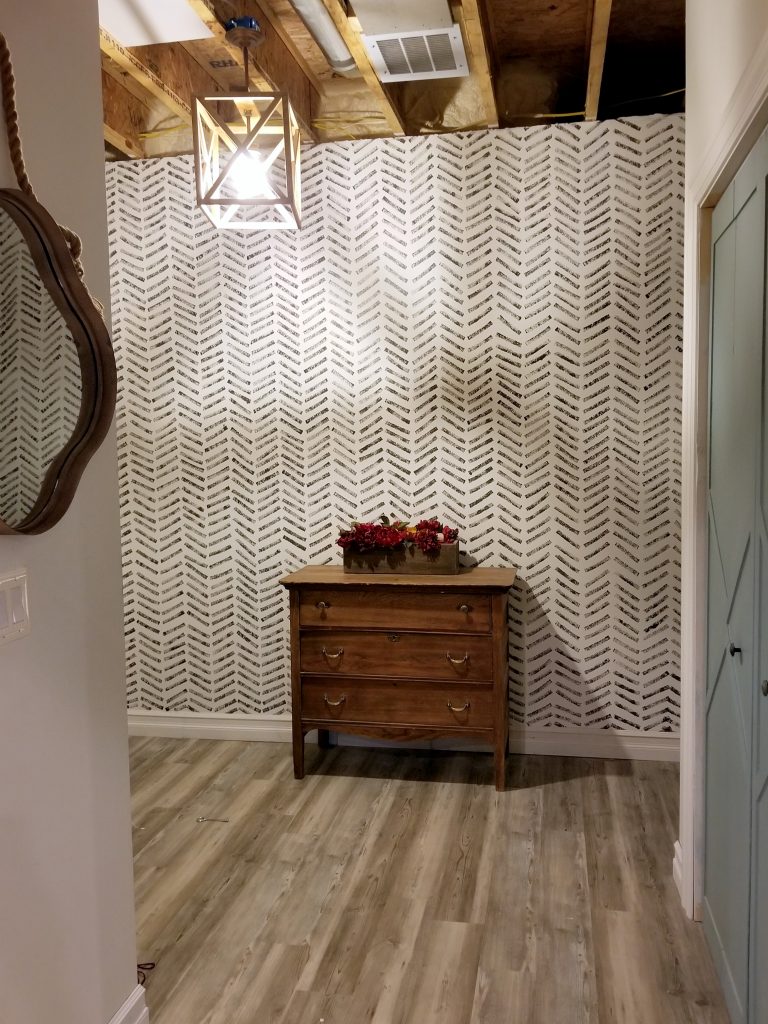

This project only took me about two hours to complete and only cost me a sponge and a little bit of paint. It was the easiest painted feature wall I’ve done yet!